Cache directory "/home2/rubinasc/public_html/wp-content/plugins/ttftitles/cache" is not writable.How to make a lifelike gumpaste rose
 One of the most satisfying moments in my career was when I participated in my first bridal expo and the florist with the booth next to mine was blown away when I told him that the flowers on my cake were not real roses but hand made sugar roses.
Although it is much easier to purchase factory produced sugar flowers, I prefer to hand-sculpt my own, petal by petal. This requires a lot of patience and skill but I think that it is worth the effort because the mass-produced sugar flowers just don’t capture the delicate and subtle nuances of a real flower in nature. It is also extremely rewarding to experience your sugar dough masterpiece come to life.
Here are detailed step-by-step instructions on how to create life-like sugar roses that anyone, from beginner to expert, can follow along to. Hope you enjoy!
Gumpaste Rose Tutorial
Equipment:
- Plastic flap (Tip: A less expensive option is a plastic sheet protector from the office supply store, just cut it so there are three open edges)
- Individual rose petal cutter (I used the largest cutter in the FMM set, if you are not using the FMM cutters, you can determine the size of the rose petal cutter needed by placing the various sizes of rose petal cutters up alongside the Styrofoam ball)
- Calyx cutter(I used the FMM Calyx Cutter)
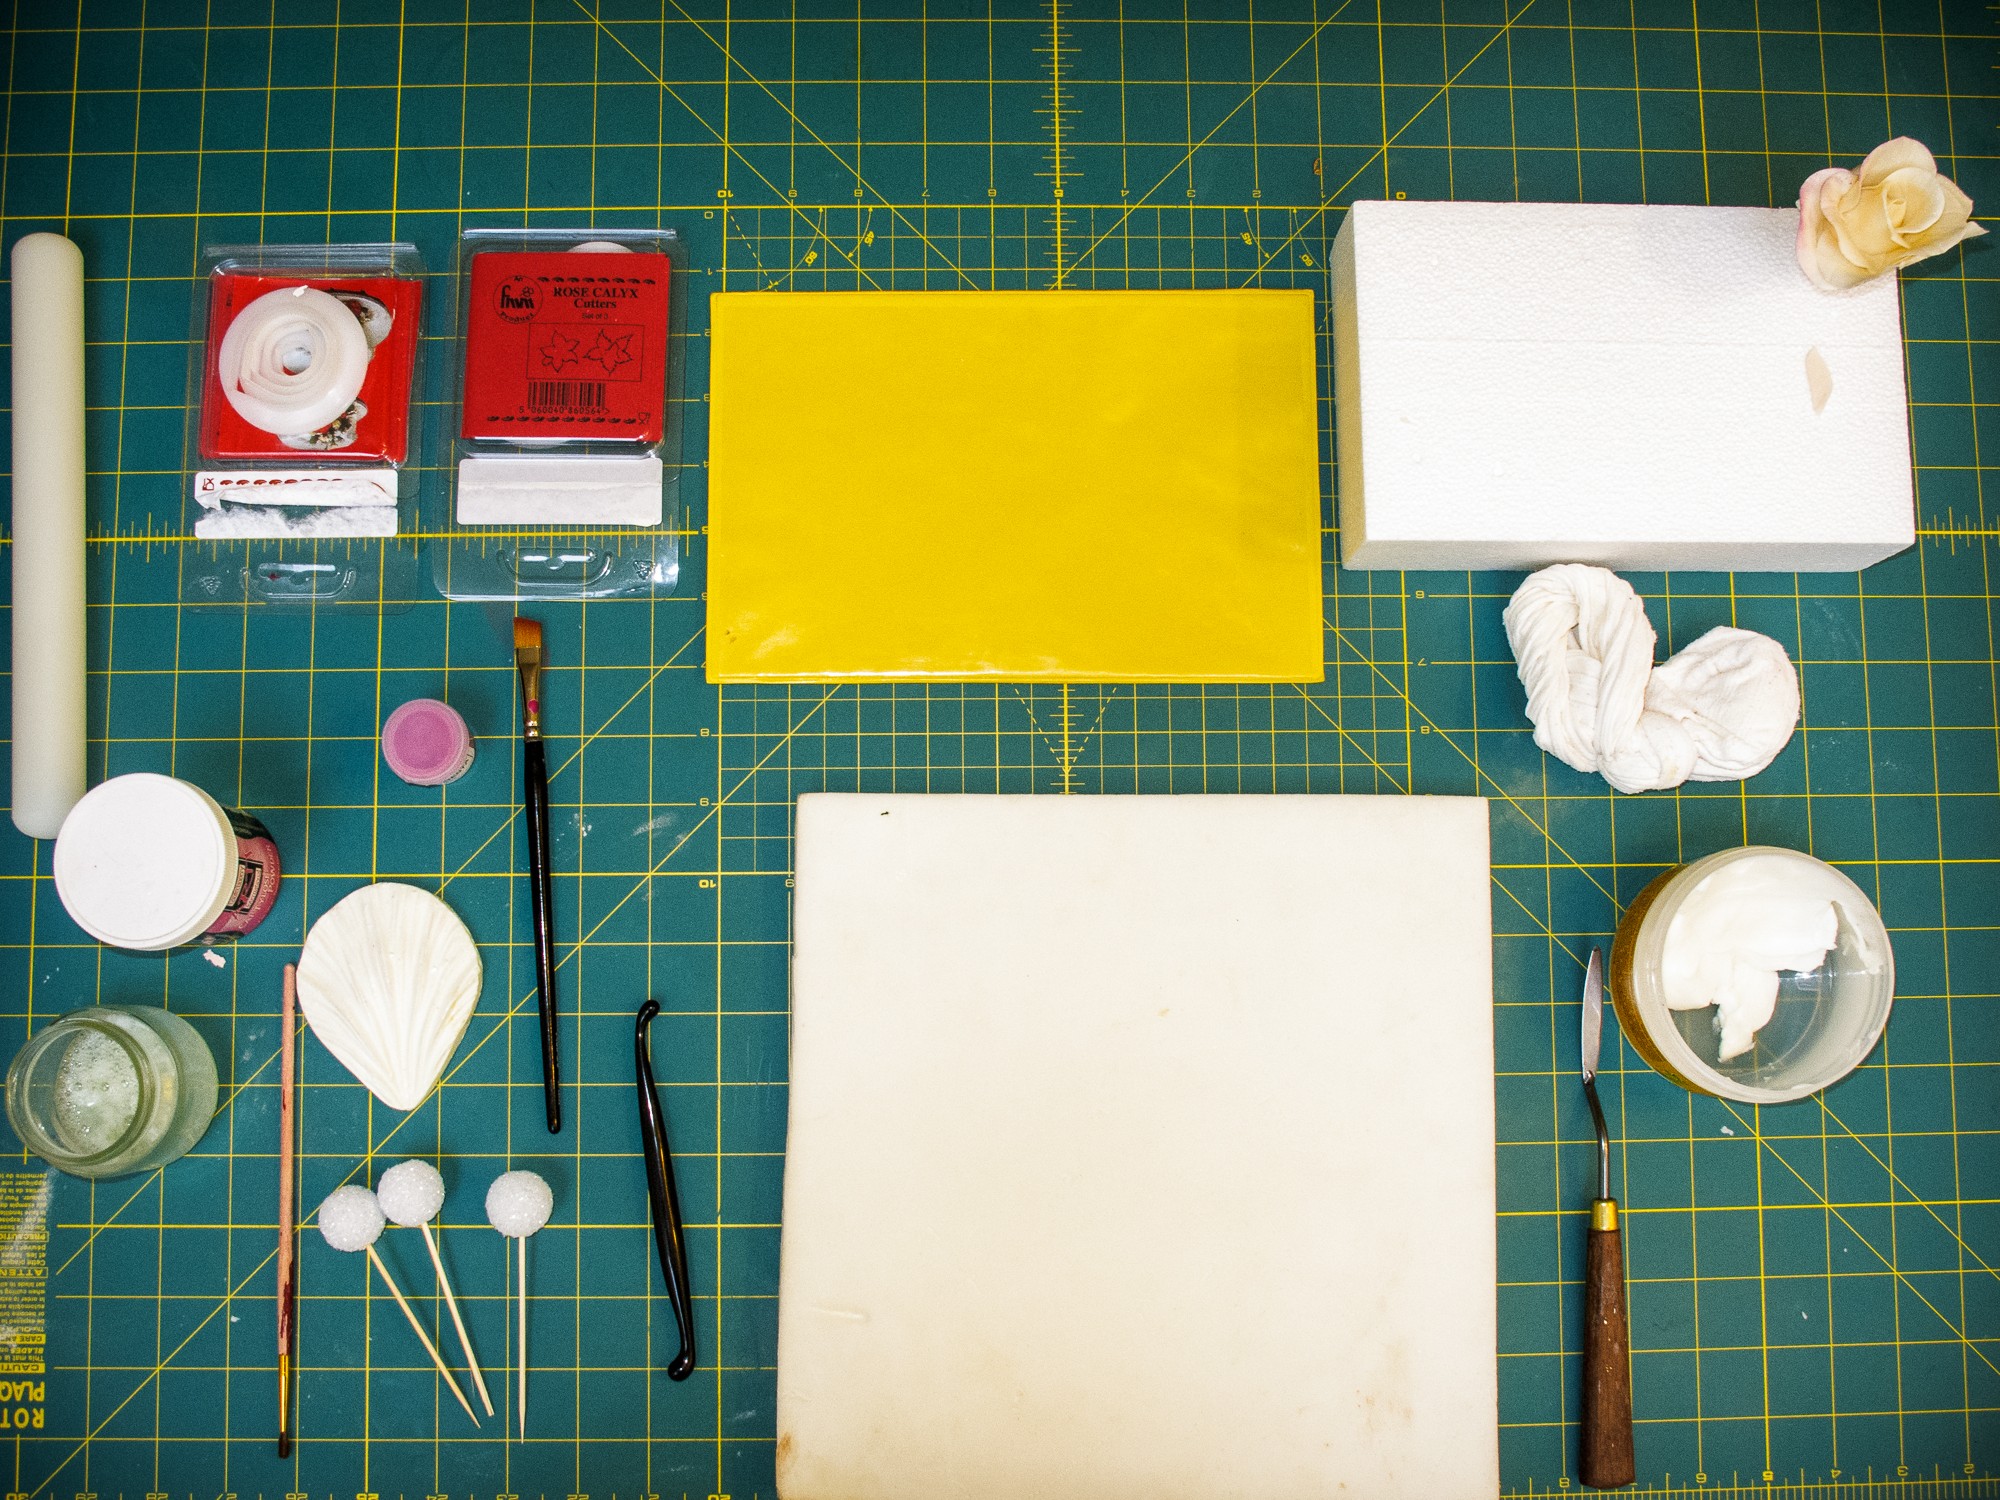
Figure A – Equipment and Materials
- Soft foam (also called a Mexican pad)
- Gumpaste rolling pin
- Styrofoam block
- Toothpick
- Glue
- Dog bone or Ball gumpaste tool
- 2 Paint brushes – one for the egg whites and one for dusting color
- Rose veiner
- Palette knife (optional)
- ¾” Styrofoam ball
- Flower former
Materials:
- Ivory gumpaste
- Green gumpaste
- Egg white (used as an edible glue, you can also use a tylose and water mixture)
- Shortening
- Corn starch
- Pink dusting powder
Instructions:
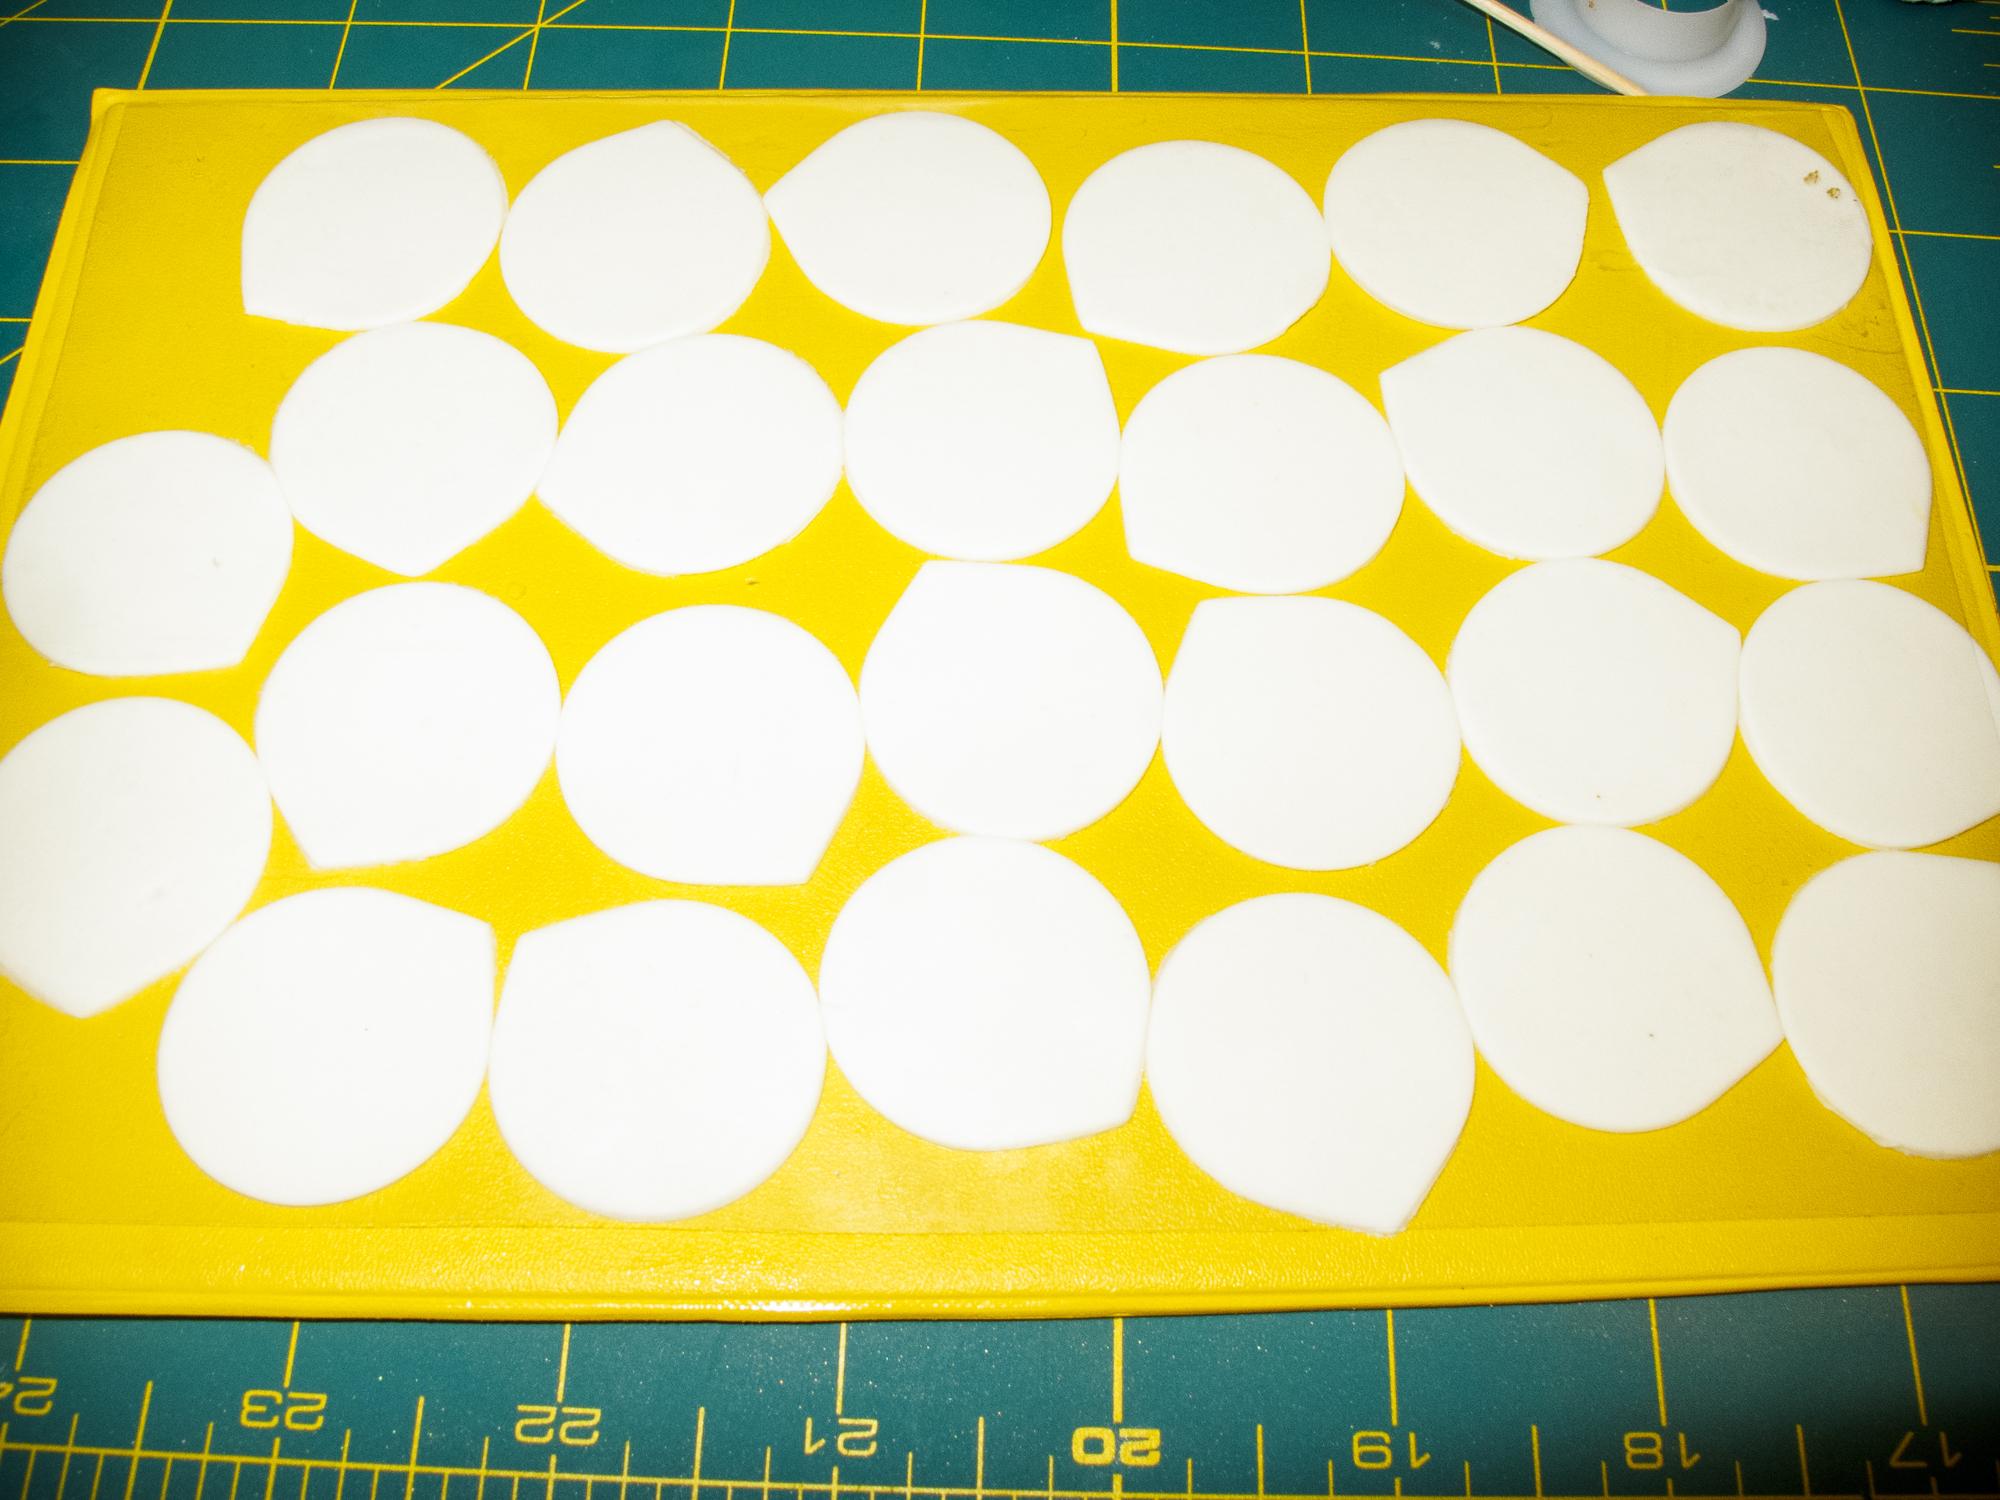
Figure B – Petal Cutouts
Bud:
- Dip one end of a toothpick into a small amount of glue.
- Insert the toothpick into the Styrofoam ball. Let it dry for a few hours.
- Knead the gumpaste until it is soft and has elasticity to it. Tip* Rub a tiny bit of shortening on your hands so the gumpaste does not stick to your hands
- Roll out the gumpaste very thin using your rolling pin or pasta roller (number 5 setting on a kitchen Aid pasta roller).
- Cut out 1 petal using the largest rose cutter in the FMM set. Tip* To save time cut all 11 petals and place them in the plastic flap so they do not dry out while you are working (Figure B) )
- Take one petal out of the plastic flap and place on your work surface with the tip pointing down.
- Brush a small amount of egg white about ½ to ¾ the way up each side of the petal.
- With the point of the petal facing down, wrap the petal around the Styrofoam ball forming a tight curl ( See #1 in Figure C).
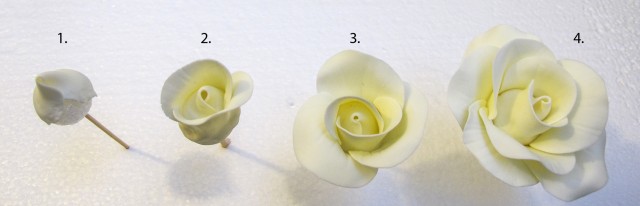
Figure C – Rose Stages
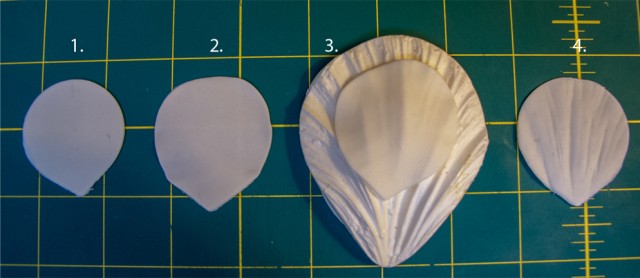
Figure D – Rose petal stages
Second Layer:
- Dust your work surface with a little bit of cornstarch so your gum paste does not stick.
- Place a petal on your work surface with the point facing down.
- Use the rolling pin to roll out the top edges of the petal as thin as you can. The bottom of the petal should remain thick so it has some support when you glue the petal onto the bud.
- Press the petal on the rose veiner. See Figure D to see the petal when it was first cut on the left to the thinned out and veined petal on the right. Tip*If the petal is sticking, you can first dust a little bit of cornstarch onto the veiner
- Place the petal on the soft foam/Mexican pad.
- Using the dog bone tool, carefully soften the edge of the petal so it gets a slight frill.
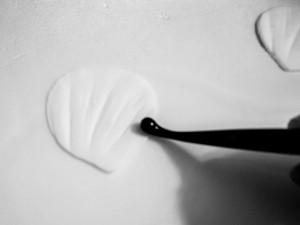
Tip* gently rub the edges of the petal with very little pressure using the tool, the tool should be half way on the soft foam and half way on the petal - Repeat Steps 2-6 so you have a total of two petals for this row.
- Brush a small amount of egg white about ½ to ¾ the way up the right side of the petal.
- Wrap the first petal around the cone.
- Wrap the second petal around the cone so that the edges of the two petals are overlapping and interlocking.
- Using your finger and a toothpick or handle of the paint brush, roll the edge of the petals back to give it a natural movement. (See #2 in Figure C above)
- Stick the toothpick end of the flower in a Styrofoam block as you prepare for the third layer.
Third Layer:
- Repeat steps 2-8 for three petals.
- Attach the three petals in a spiral pattern, interlocking the third petal into the first.
- Using your finger and a toothpick or the handle of the paint brush, roll the edges of the petals back to give it a natural movement. (See #3 in Figure C)
- Place the flower in a flower former and stick the toothpick end of the rose in a Styrofoam block. Let it dry as you prepare for the fourth layer.
Tip* The flower former is not necessary, but I like to use it so the petals keep their form until they dry and don’t droop down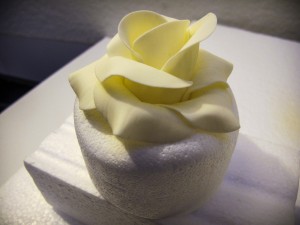
Figure F – Rose drying in the flower former.
Fourth Layer:
- Repeat steps 2-8 for five petals.
- Attach the five petals in a spiral pattern, interlocking the fifth petal into the first.
- Using your finger and a toothpick or the handle of the paint brush, roll the edges of the petals back to give it a natural movement.
Tip* Pinch the petals so the petals in this row are a little pointed See #4 in Figure C . - Place the flower in a flower former and stick the toothpick end of the rose in a Styrofoam block. Let it dry completely before coloring. (Figure F)
Calyx:
- Roll out some green gumpaste very thin.
- Cut out a calyx for the rose.
- Brush a small amount of egg white on each of the calyx’s sepals.
- Thread the toothpick through the center of the calyx.
- Attach the calyx to the base of the rose.
- Let dry.
Note: I did not add a calyx to the white and pink rose photographed in this tutorial because the green just didn’t look right on the cake that I was making the roses for, but I have attached a picture of red roses with the calyxes for you to see.
Coloring:
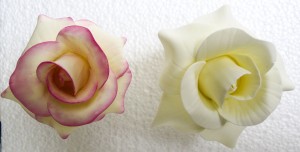
Figure G- Rose dusted with pink petal dust (left) in comparison to plain ivory rose(right)
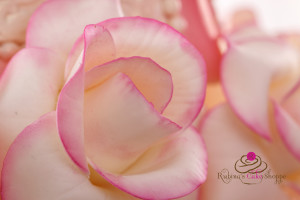
Make sure your rose is completely dry before you start dusting so you don’t break the petals in the process. I chose to make an ivory rose with pink edges but you can color your rose any color you like.
- Lightly dust the edges of each petal with the pink dusting powder, stroking from the edge of the petal to the center so the color lightens as it goes to the center. (Figure G)
- Dust the calyx with green dusting powder.
- Hold the rose over a steamer for a couple of seconds. Be careful not to hold it there for too long or the moisture will melt the petals. This seals in and enhances the color.
Note: If you do not have a steamer, you can use a pot by boiling water it until it starts steaming, turn off the heat, quickly place your rose over the steam for a couple of seconds
You can see my finished roses below(Figure H). I would love to see pictures of your creations! Feel free to share them, as well as any questions or feedback on our facebook page.
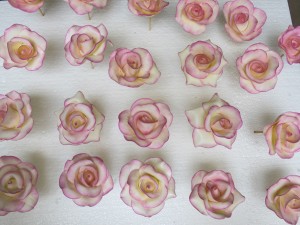
Figure H – Gumpaste rose patch
Always,
Rubina


