Cache directory "/home2/rubinasc/public_html/wp-content/plugins/ttftitles/cache" is not writable.New Year, New Endeavors

newyearswish


I recently met up with my former assistant who attended The Art Institute of Orange County’s Pastry Arts program. She mentioned how every time she bakes, she still thinks of me and in her words, “how I would do it”. She said that even though she has taken courses, it’s challenging for her to get things “perfect”. She felt like she learned much more from me than she did in culinary school. She couldn’t understand how I learned to bake and decorate cakes without formal training. I was honored to hear this because I still think of my mentors in the cake industry, Chris Russom and Marjorie Chua, when I’m in the kitchen. For someone to think that about me, especially someone who has learned from chefs at a prestigious culinary institution is huge in my eyes.

So how did I do it?

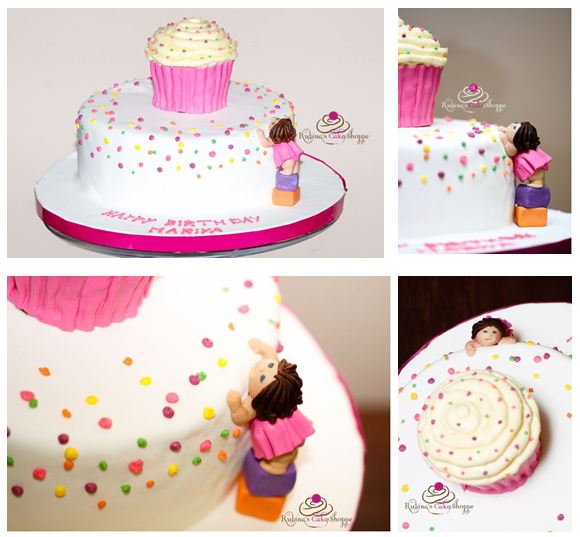
My desire to become a cake artist sparked in 2006, a year after I got my degree in Electrical Engineering from UC Irvine. There was not an abundance of information on cake decorating on the web like there is today. I would watch the Food Network Cake Challenges and literally pause and replay every minute of the show, trying to understand what techniques the cake artists used so I could try the techniques at home. My mother was an artist and I took art classes throughout my life so I was pretty comfortable with the artistic side of cake decorating. I just had to learn how to work with a new medium. Baking was a whole different story…

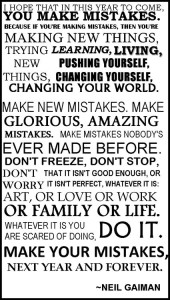
I would love to say that baking came naturally to but the truth is, it didn’t. I had never baked from scratch prior to the day I decided to leave engineering and work for Christopher Garren’s Let Them Eat Cake to become a cake artist eight years ago. The reality of the glamorous cake industry soon kicked in and lets just say, it was not “a piece of cake” like you would think. I was thankful for the opportunity that Chris Russom and Marjorie Chua gave me but after about 3 months I realized it was not the right career for me at the time. I ended up going back to engineering but I did not give up on my dream of being a professional cake artist. I had a passion and a determination to prove to myself that I could do it. I had MANY frustrating moments in the kitchen early on and to be honest, I still do. I’m a perfectionist so I would take it to heart when I made a mistake but I learned to embrace the “mistakes” and use them as a learning opportunity or an opportunity to improvise and create something new. It took years of hard work in addition to trial and error that got me to the point where I am now and my culinary journey is nowhere near close to being over.

Looking back at where I began and how far I have come has inspired me to start teaching private and semi-private classes in baking and cake decorating (please click here to get more information). I also plan to continue blogging my journey so that all of you could join me and learn from my successes (and failures).

Wishing you a happy new year filled with joy and happiness. May you do what you love and do it often.

~ Rubina


Cache directory "/home2/rubinasc/public_html/wp-content/plugins/ttftitles/cache" is not writable.Ooey Gooey Chocolate Fudge Cookie Cake


ChocolateFudgeCookieCake


My husband is a cookie monster and I couldn’t choose between making cookies or a cake for his birthday last week, so I decided to get the best of both and made a triple chocolate fudge cookie cake. I layered six fresh baked gluten-free  chocolate fudge cookies with chocolate ganache oozing out between each layer. He absolutely loved it and said that I’ll have a tough time topping it on his birthday next year. My response – I’m not even gonna try to top it, we now have a birthday tradition. =)

Happy birthday to the best husband, father, and friend!

ChocolateFudgeCookieCakeRCS

Cache directory "/home2/rubinasc/public_html/wp-content/plugins/ttftitles/cache" is not writable.Under The Sea Cake

This ‘Under the Sea’ themed cake was made for Landon’s first birthday. Landon’s parents wanted something that was fun and colorful to reflect the decorations of the party. The cake is air brushed with a gradient blue starting with a dark blue base working its way up to a light blue, just like the ocean. The light and dark blue marbled fondant wave wrapping around each tier adds motion to the cake.  The sea creatures such as yellow fish, orange starfish, and red coral with the green sea weed add pops of color to the cake. The edible sand and realistic looking fondant seashells at the base of the cake add a realistic touch. The adorable whale blowing water out of its spout is floating up halfway out of the water.

Flavor: Peanut Butter Pandemonium-Vanilla cake with a layer of peanut butter filling and a layer of chocolate ganache.

Happy First Birthday Landon!

Cache directory "/home2/rubinasc/public_html/wp-content/plugins/ttftitles/cache" is not writable.Mariya’s First Birthday Cake

This cake is very dear to me, it was made for my precious little girl’s first birthday. Mariya is a tiny little thing with a big personality. She is very active and keeps me on my toes, always trying to climb and jump off of everything from sofas to tables. She has a huge sweet tooth (who knows where that came from?!) – no one can dare to eat a dessert in front of her without giving her a little taste. I wanted to capture her fun and magnetic energy in a cake so this cake is Mariya, climbing up her blocks trying to get to a giant cupcake.

Flavors: Pumpkin chocolate chip cake filled with cream cheese buttercream

Happy First Birthday to my heart and soul, my baby girl Mariya!

Cache directory "/home2/rubinasc/public_html/wp-content/plugins/ttftitles/cache" is not writable.Unstacked Wedding Cake

Unstacked Wedding Cake

This week’s wedding cake was made for a Pakistani bride who wanted  something traditional yet unconventional. We gave her just that by deconstructing the cake into individual tiers and placing them side-by side atop their own vases with varying heights and sizes.

The ‘top’ and ‘bottom’ tiers were inspired by the colors and pattern on the bride’s traditional Pakistani bridal gown. The ‘middle’ tier adorned with peach pearls reflected the decor of the wedding, fusing together the East and the West.


Unstacked_Cake2


Cache directory "/home2/rubinasc/public_html/wp-content/plugins/ttftitles/cache" is not writable.How to make a lifelike gumpaste rose

pinkrosecloseup
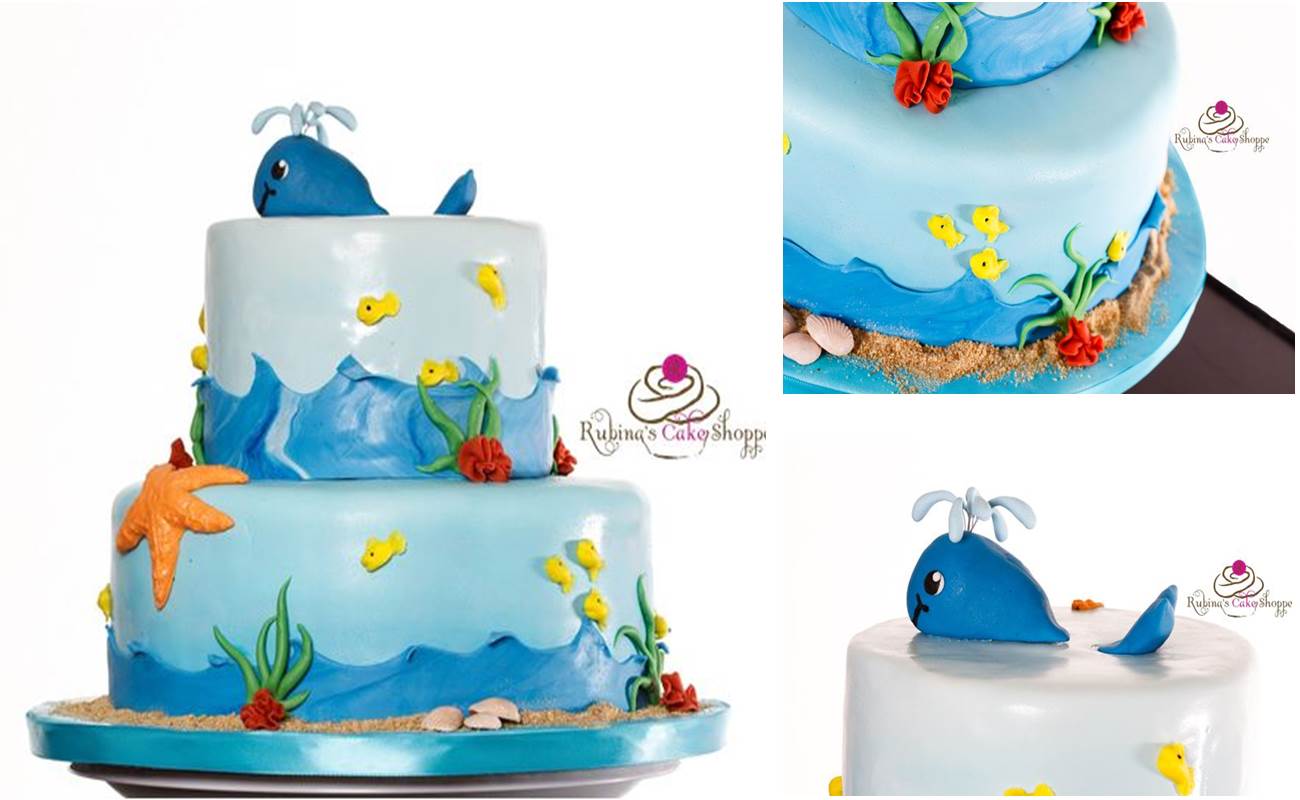
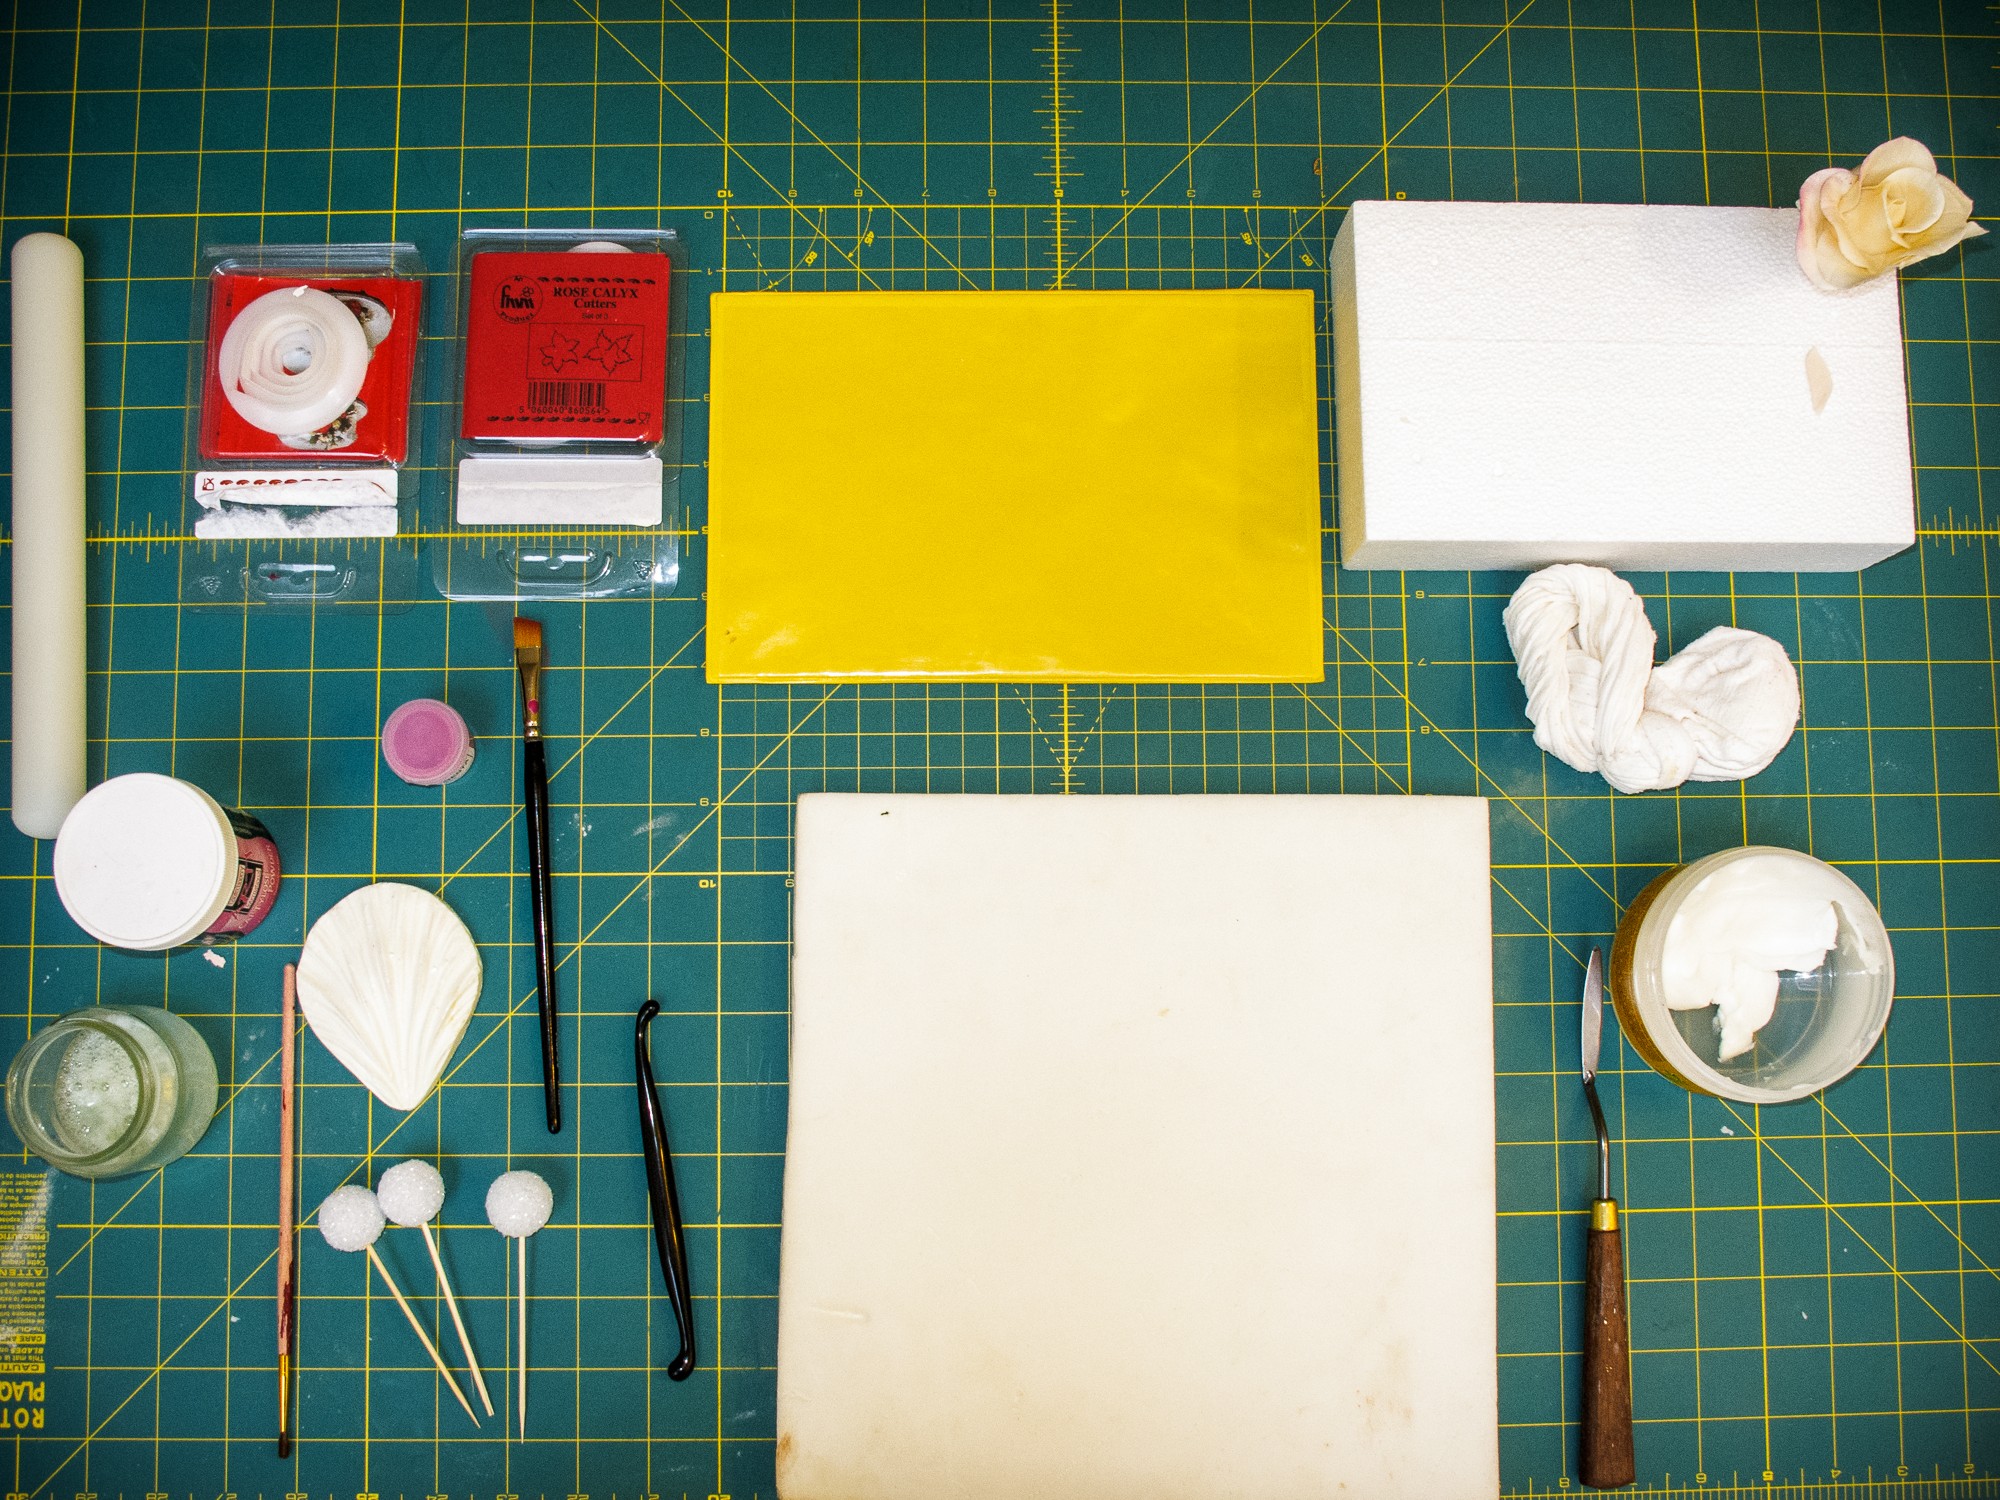
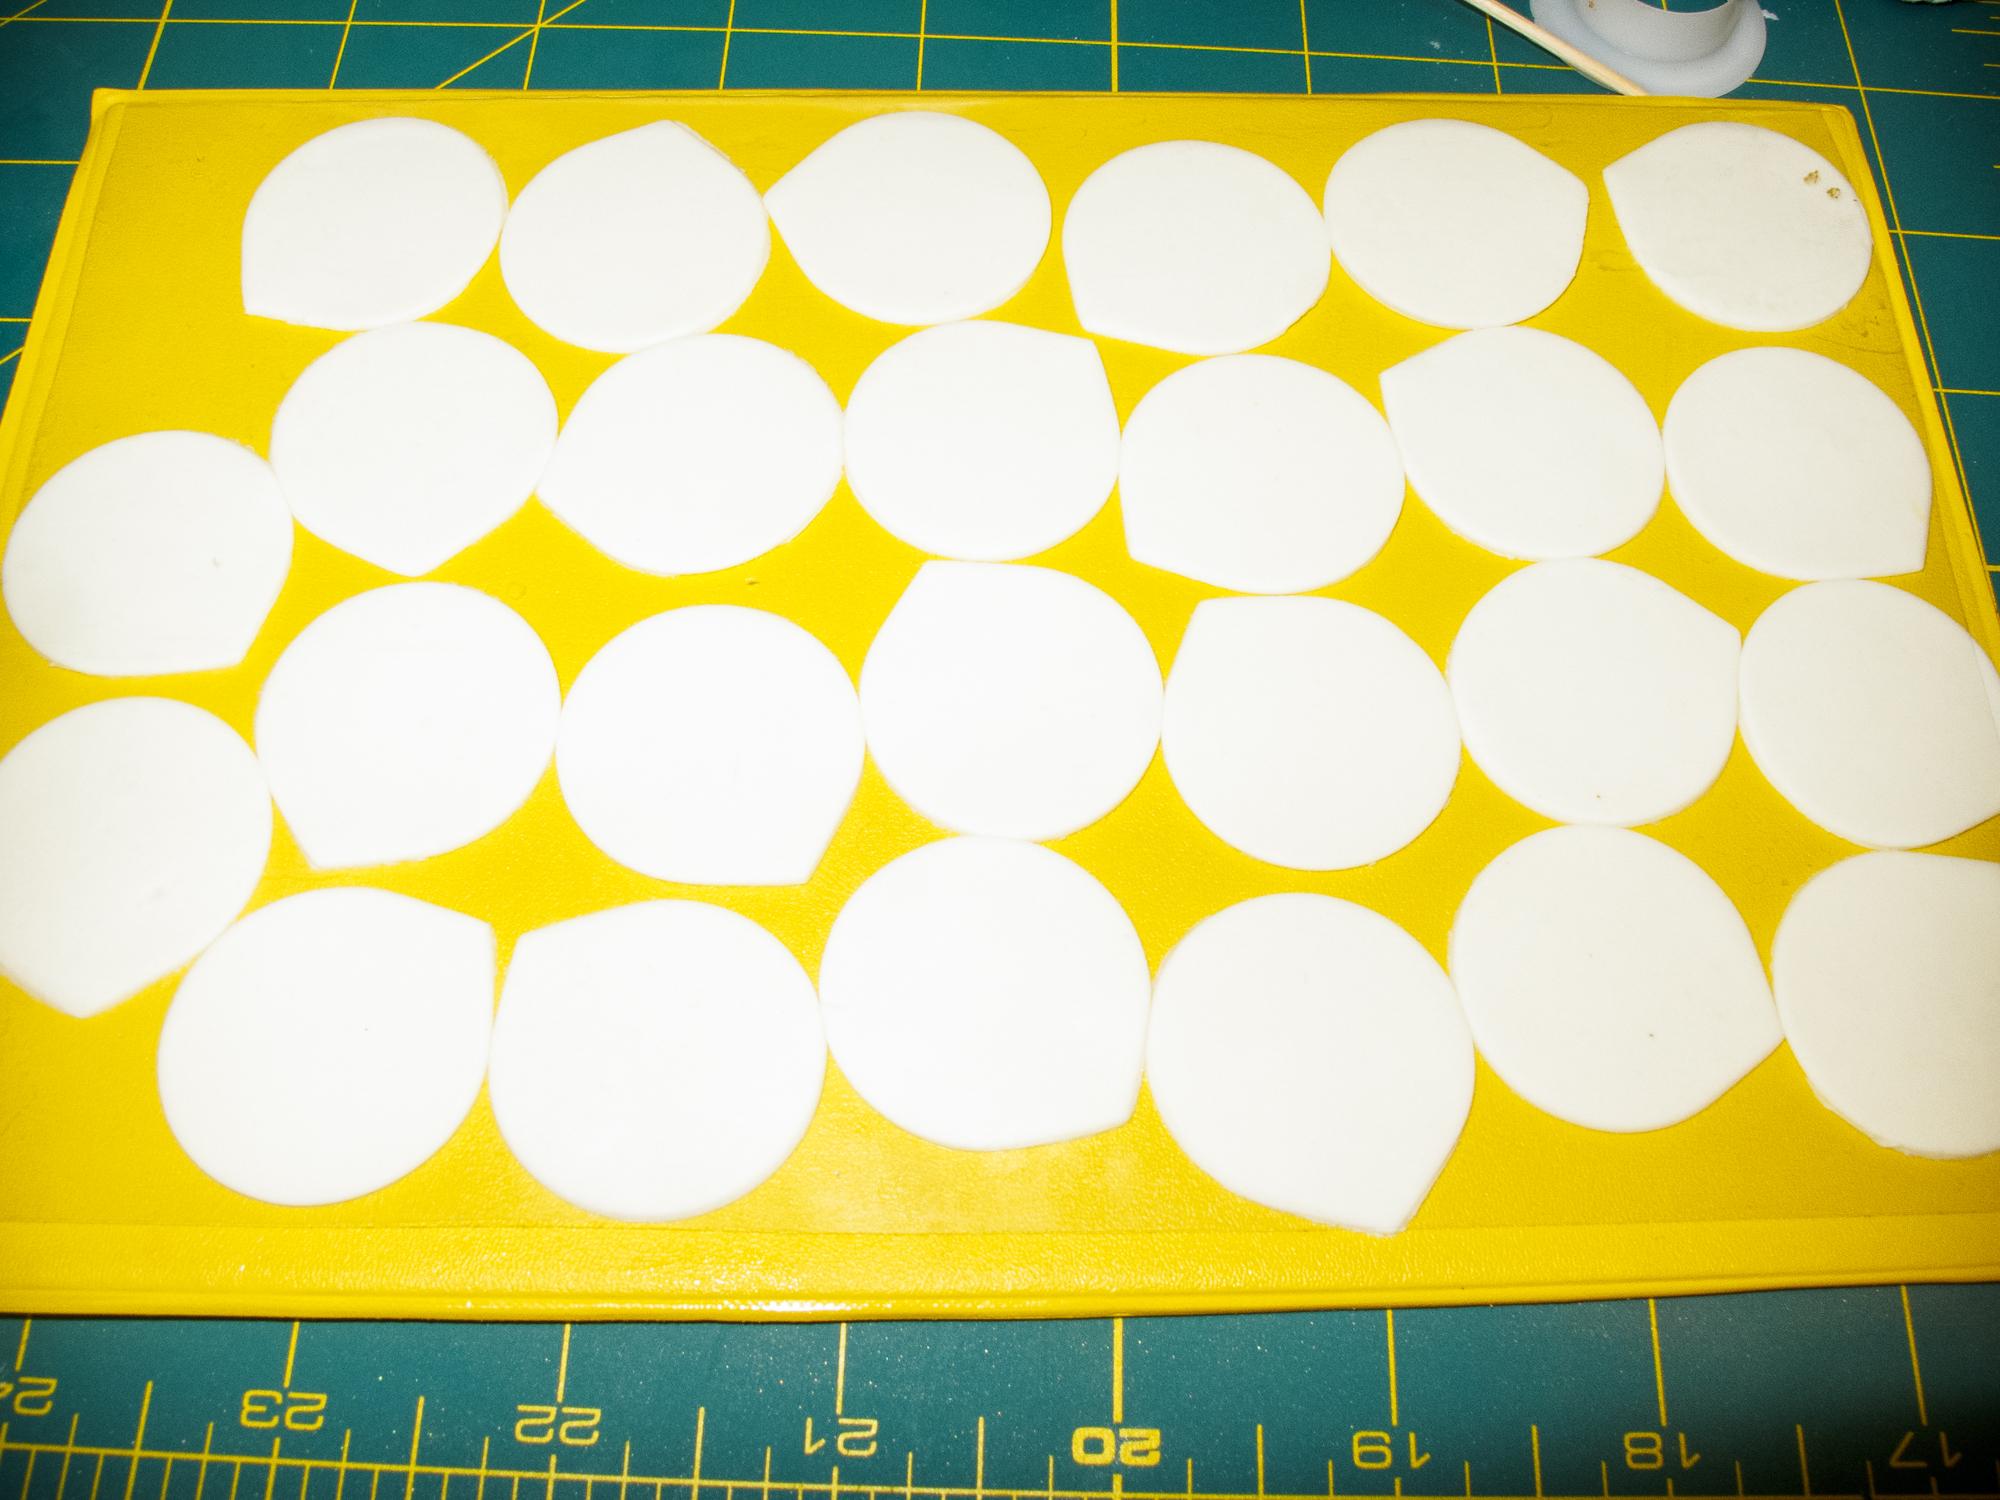
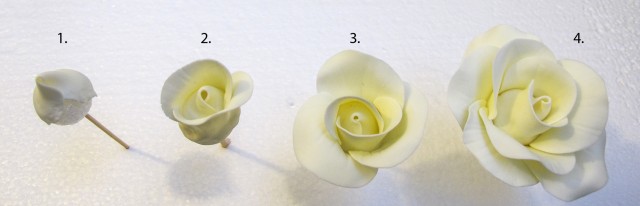
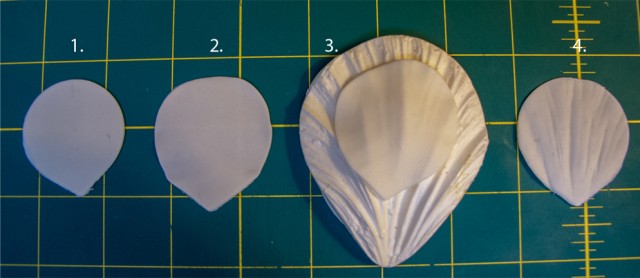
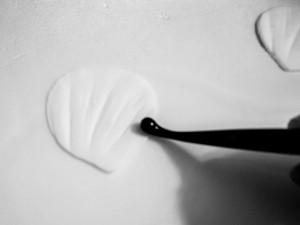
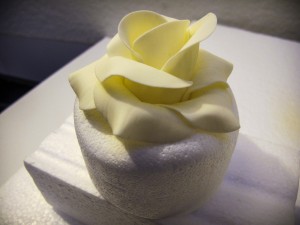
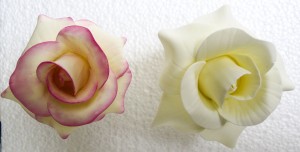
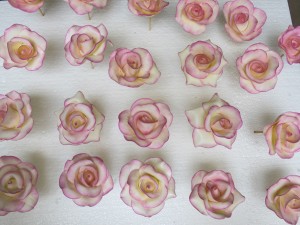
One of the most satisfying moments in my career was when I participated in my first bridal expo and the florist with the booth next to mine was blown away when I told him that the flowers on my cake were not real roses but hand made sugar roses.

Although it is much easier to purchase factory produced sugar flowers, I prefer to hand-sculpt my own, petal by petal. This requires a lot of patience and skill but I think that it is worth the effort because the mass-produced sugar flowers just don’t capture the delicate and subtle nuances of a real flower in nature. It is also extremely rewarding to experience your sugar dough masterpiece come to life.

Here are detailed step-by-step instructions on how to create life-like sugar roses that anyone, from beginner to expert, can follow along to. Hope you enjoy!


Gumpaste Rose Tutorial

Equipment:


  • Plastic flap (Tip: A less expensive option is a plastic sheet protector from the office supply store, just cut it so there are three open edges)
  • Individual rose petal cutter (I used the largest cutter in the FMM set, if you are not using the FMM cutters, you can determine the size of the rose petal cutter needed by placing the various sizes of rose petal cutters up alongside the Styrofoam ball)
  • Calyx cutter(I used the FMM Calyx Cutter)

    gumpaste rose supplies

    Figure A – Equipment and Materials

  • Soft foam (also called a Mexican pad)
  • Gumpaste rolling pin
  • Styrofoam block
  • Toothpick
  • Glue
  • Dog bone or Ball gumpaste tool
  • 2 Paint brushes – one for the egg whites and one for dusting color
  • Rose veiner
  • Palette knife (optional)
  • ¾” Styrofoam ball
  • Flower former


Materials:


  • Ivory gumpaste
  • Green gumpaste
  • Egg white (used as an edible glue, you can also use a tylose and water mixture)
  • Shortening
  • Corn starch
  • Pink dusting powder


Instructions:

petals

Figure B – Petal Cutouts

Bud:

  1. Dip one end of a toothpick into a small amount of glue.
  2. Insert the toothpick into the Styrofoam ball. Let it dry for a few hours.
  3. Knead the gumpaste until it is soft and has elasticity to it.                                                   Tip* Rub a tiny bit of shortening on your hands so the gumpaste does not stick to your hands
  4. Roll out the gumpaste very thin using your rolling pin or pasta roller (number 5 setting on a kitchen Aid pasta roller).
  5. Cut out 1 petal using the largest rose cutter in the FMM set.                                               Tip* To save time cut all 11 petals and place them in the plastic flap so they do not dry out while you are working  (Figure B) )
  6. Take one petal out of the plastic flap and place on your work surface with the tip pointing down.
  7. Brush a small amount of egg white about ½ to ¾ the way up each side of the petal.
  8. With the point of the petal facing down, wrap the petal around the Styrofoam ball forming a tight curl ( See #1 in Figure C).


rose stages

Figure C – Rose Stages


Petal Stages

Figure D – Rose petal stages

Second Layer:

  1. Dust your work surface with a little bit of cornstarch so your gum paste does not stick.
  2. Place a petal on your work surface with the point facing down.
  3. Use the rolling pin to roll out the top edges of the petal as thin as you can. The bottom of the petal should remain thick so it has some support when you glue the petal onto the bud.
  4. Press the petal on the rose veiner. See Figure D to see the petal when it was first cut on the left to the thinned out and veined petal on the right.          Tip*If the petal is sticking, you can first dust a little bit of cornstarch onto the veiner
  5. Place the petal on the soft foam/Mexican pad.
  6. Using the dog bone tool, carefully soften the edge of the petal so it gets a slight frill.
    Figure E - Frilling the edges
    Tip* gently rub the edges of the petal with very little pressure using the tool, the tool should be half way on the soft foam and half way on the petal
  7. Repeat Steps 2-6 so you have a total of two petals for this row.
  8. Brush a small amount of egg white about ½ to ¾ the way up the right side of the petal.
  9. Wrap the first petal around the cone.
  10. Wrap the second petal around the cone so that the edges of the two petals are overlapping and interlocking.
  11. Using your finger and a toothpick or handle of the paint brush, roll the edge of the petals back to give it a natural movement.  (See #2 in Figure C above)
  12. Stick the toothpick end of the flower in a Styrofoam block as you prepare for the third layer.

Third Layer:

  1. Repeat steps 2-8 for three petals.
  2. Attach the three petals in a spiral pattern, interlocking the third petal into the first.
  3. Using your finger and a toothpick or the handle of the paint brush, roll the edges of the petals back to give it a natural movement. (See #3 in Figure C)
  4. Place the flower in a flower former and stick the toothpick end of the rose in a Styrofoam block. Let it dry as you prepare for the fourth layer.
    Tip* The flower former is not necessary, but I like to use it so the petals keep their form until they dry and don’t droop down

    Rose drying in the flower former.

    Figure F – Rose drying in the flower former.

Fourth Layer:

  1. Repeat steps 2-8 for five petals.
  2. Attach the five petals in a spiral pattern, interlocking the fifth petal into the first.
  3. Using your finger and a toothpick or the handle of the paint brush, roll the edges of the petals back to give it a natural movement.
    Tip* Pinch the petals so the petals in this row are a little pointed See #4 in Figure C .
  4. Place the flower in a flower former and stick the toothpick end of the rose in a Styrofoam block. Let it dry completely before coloring. (Figure F)

 Calyx:

  1. Roll out some green gumpaste very thin.
  2. Cut out a calyx for the rose.
  3. Brush a small amount of egg white on each of the calyx’s sepals.
  4. Thread the toothpick through the center of the calyx.
  5. Attach the calyx to the base of the rose.
  6. Let dry.

Note: I did not add a calyx to the white and pink rose photographed in this tutorial because the green just didn’t look right on the cake that I was making the roses for, but I have attached a picture of red roses with the calyxes for you to see.

 Coloring:

Figure G- Rose dusted with pink petal dust (left) in comparison to plain ivory rose(right)

Figure G- Rose dusted with pink petal dust (left) in comparison to plain ivory rose(right)

Make sure your rose is completely dry before you start dusting so you don’t break the petals in the process. I chose to make an ivory rose with pink edges but you can color your rose any color you like.

  1. Lightly dust the edges of each petal with the pink dusting powder, stroking from the edge of the petal to the center so the color lightens as it goes to the center. (Figure G)
  2. Dust the calyx with green dusting powder.
  3. Hold the rose over a steamer for a couple of seconds. Be careful not to hold it there for too long or the moisture will melt the petals.  This seals in and enhances the color.
    Note: If you do not have a steamer, you can use a pot by boiling water it until it starts steaming, turn off the heat, quickly place your rose over the steam for a couple of seconds


You can see my finished roses below(Figure H). I would love to see pictures of your creations! Feel free to share them, as well as any questions or feedback on our facebook page.


Finished gumpaste roses

Figure H – Gumpaste rose patch

Always,
Rubina


Cache directory "/home2/rubinasc/public_html/wp-content/plugins/ttftitles/cache" is not writable.Dragon Groom’s Cake

I am so excited to share this dragon groom’s cake with all of you. Not only is it super cool but it has the cutest story behind it!

Muna, the bride, is a huge fan of fairy tales so when the groom, Amr, asked Muna’s parents for her hand in marriage, Muna’s father told him that he will have to ‘slay a dragon’ to win over his daughter’s heart. Muna’s parents surprised the couple with this dragon cake on the day of the wedding so Amr literally had to ‘slay the dragon’ for Muna.

I had a blast making this cake and adding all the realistic details. It is covered in a green fondant textured like reptile skin. We incorporated Muna’s favorite color purple in the purple and green two tone skin and the purple scales and claws. Although this dragon is fierce on the outside he is sweet on the inside, made from 100% chocolate cake. I have added behind the scene pictures for you to see the sculpting and decorating process.
Enjoy!

dragonprogress


Cache directory "/home2/rubinasc/public_html/wp-content/plugins/ttftitles/cache" is not writable.Come taste our cakes!

RCS_Tasting_event_flyer

Come sample some of our cake flavors and view our edible creations at Frontier Heritage, a premiere South Asian clothing boutique on Sunday, March 17, 2013.

If you are not a bride or groom and need a cake for a special event, or just love cake and fashion, you’re also welcome to join us!

Cache directory "/home2/rubinasc/public_html/wp-content/plugins/ttftitles/cache" is not writable.Tips For Getting The Best Wedding Cake

sabacake-bmp

The wedding cake has become the cornerstone of every wedding. That first bite of cake signifies the first taste of married life.

Most couples want a cake that is unique, tasty, and different from the rest. The wedding cake is not just dessert, but an edible work of art that serves as the focal point at your reception.

Brides spend a lot of time imagining the perfect wedding cake, but become overwhelmed when it’s time to select one. Here are seven simple but essential tips to help you select your perfect wedding cake:

1. The early bird gets the….best cake

Start shopping early, the best cake vendors are often booked far in advance. In an ideal world, you should order your wedding cake 4-6 months prior to your wedding date. This will help ensure that the cake vendor is available and has enough time to create a personalized and unique design.

2. Word of mouth

Recommendations from friends are the best way of finding a good bakery. If you have tasted a wonderful cake at a wedding or party, don’t hesitate to ask the host where they ordered the cake.

3. Don’t sacrifice flavor for appearance

The taste of the cake is equally as important as the design. Find a bakery that can make a beautiful and delicious cake. Select a cake flavor that the bride, groom, and the guests will enjoy. Enjoying the cake is usually the last event of the reception, and there’s nothing better than a delicious grand finale.

4. Talk money

Be upfront and honest with your cake vendor when discussing budget. They may be able to come up with a beautiful design that accommodates your budget. Be realistic about the budget, a good quality wedding cake can cost from anywhere from $5/ serving to $30/serving depending on the intricacy of design.

5. Go in prepared

Wedding cakes are no longer just round and white, they are a unique a way to tie in all aspects of the wedding theme into one delectable package. In order to ensure you get a show-stopping cake, come prepared to your wedding cake consultation. Bring pictures or pieces of your bridal gown, flowers, decorations – anything that will help inspire a design for the cake artist. The result will be a cake design that reflects your theme and your style.

6. Be organized and efficient, even with something as basic as the cake cutting.

Try to do the cake cutting ceremony before dinner is served so that the cake can be cut during dinner time and will be ready to serve immediately after dinner. At South Asian weddings, guests often head out soon after dinner and don’t stay for the serving of the wedding cake. You put in so much effort in picking the perfect cake that it would be a shame for your guests to miss out.

7. Have your cake and eat it too!

Make sure to assign a friend or family member to save you a slice. Brides and grooms are so busy during the reception that they miss out on eating their own wedding cake. It’s your special day that you will remember forever, and you want to enjoy every piece of it.

Cache directory "/home2/rubinasc/public_html/wp-content/plugins/ttftitles/cache" is not writable.Wishing you a happy and healthy 2013!


If there is one New Year’s Resolution most of us share, it’s to get in better shape. There are many ways to do that, but I can tell you a less conventional approach that has proven to be successful – reward your fitness successes and milestones with a delicious cake from Rubina’s Cake Shoppe!

This cake was created for the Total Body Transformation contest, led by Hollywood celebrity and professional sports trainer, author and president of the Supplement Research Foundation, Rehan Jalali. After coaching his team for 90 days through a rigorous diet and exercise routine, there was an awards ceremony and celebratory party, where each contestant unanimously agreed to wanting one thing more than anything else- cake! After deciding the contestants were “Too Hot” for the scale, the cake you see above was born.

The Rubina’s Cake Shoppe team would like to wish you all a happy and healthy 2013, and would also like to remind you that no celebration, not even the finale of a fitness competition, can truly be topped off without sinking your teeth into an indulgent cake.